Thursday, March 27, 2014

RIP : MH370

It was a sad news regarding the MH370 tragedy, I sincerely hope that all the relatives, loved ones and friends of the 200+ passengers on board that fateful flight can get over the grieves ASAP.

I've been following closely the news and was hoping for a miracle that the plane to be found in some remote island.
I'm still hoping for a miracle .........

Friday, February 14, 2014

Bread making

I've been making my own bread since our return from Ipoh CNY trip in early Feb.

Bread recipe (using Tang Zhong method)
A
200g bread flour
90g plain flour
30g caster sugar
6g instant yeast
12g milk powder
1 egg (without shell 60g)
65g water
Salt 6g (if using salted butter 2g)
Tang Zhong 80g
Cranberry 30g (optional)

B
50g Butter (unsalted)

Method 
1 mix A group of ingredient using stand mixer (hook) till well mix and bowl clean using low speed
2 add in butter and mix using low speed till well combine then beat till non sticky and the dough is elastic (pass the stretch membrane test)
3 shape the dough into round shape & put it in a greased bowl and let it proof in room temperature for about 45mins (dough size double)
4 dust finger with flour and poke the dough to test if well proof, if hole remains then it's ok
5 Divide the dough into 10 to 11 round balls of about 55g each, let dough rest for another 10 mins
6 shape the dough into oval shape by flattening the ball, fold the long sides then seal the 2 ends tightly 
7 line the dough on a well greased baking tray, remember to leave sufficient gap in between
8 put the baking tray inside the oven to proof the dough for 40mins, turn on the oven light without the heat and put a tray of hot water underneath the baking tray of bread dough
9 check that the dough is double in size and butter wash the dough (can sprinkle cheese & parsley on top)
10 remove from oven n preheat 180'c
11 bake at 180'c for 15min
12 once turn golden brown, remove from oven n butter wash

Top pic is bread with cheese n parsley 
Bottom is plain butter roll


Happy Valentine's Day 2014!

This year RY (as usual) bought me a bouquet of red roses and suggested dinner.
I didn't want to spend hours in the long q outside the restaurant, I had declined his offer.

I'll be making his favorite dish, yellow ginger chicken, for tonight's dinner.

I've no gift for my love, so I've made this Garrett (copy cat version) caramel popcorn for him since he loves the Garrett very much.

My copy cat Garrett caramel popcorn recipe:
Popcorn 
100g corn kernel
2 tbsp oil
A handful of peanuts or cashew nuts (I use cashew)

Caramel
50g butter (salted)
A pinch of salt (if use unsalted butter then 1/2 tsp)
80g brown sugar
50g corn syrup
1tsp baking soda

Method
Popcorn
1 Heat up non stick pan (I use Happycall)
2 add oil
3 test the heat by throwing 1 or 2 kernels see if it pops, once pop, add in all (shake/ stir to make sure all coated with oil)
4 when the popping sound stops, pour the popcorn in a baking tray line with parchment paper (remove those unpopped ones)
5 mix in the cashew nuts

Caramel
1 add butter, sugar, syrup, salt in a small saucepan, bring to boil using low heat
2 stir continuously to prevent burnt bottom
3 once big boil, off the fire, add in the baking soda and stir till the foam subsided and the caramel is ready

Baking (heat up oven 150'c)
1 pour the hot caramel over the popcorn and stir till evenly coated
2 bake the popcorn for 5 mins, remove from oven and stir, (repeat another 3 rounds)
3 let it cool down and the Garrett style popcorn is ready


Sunday, January 19, 2014

Yellow Butter Choco Chips Cake

With 2 leftover egg yolk from yesterday's Almond Crisps' bakes, I've baked this Yellow Butter Choco Chips cake.

Ingredient 
Cake flour 100g
Baking powder 1 tsp
Butter 60g at room temp but not melted (salted)
Castor sugar 60g
Egg yolk 2 (35g)
Milk 80ml
Vanilla extracts 3/4 tsp
Chocolate chips 30g for batter and 10g to sprinkle

Method (preheat oven 180'c and line a rectangular baking tin with parchment paper)
1 cream butter till turn pale yellow and creamy
2 add in sugar in batches to cream into he butter till fluffy and light
3 add egg yolk one by one and mix well in circular motion then add in vanilla extracts
4 fold in flour and milk in alternate batches using spatula (flour in 3 batches and milk in 2 batches, flour being the 1st and the last). Ensure not over mix.
5 fold in chocolate chips
6 lightly pour into the baking tin and bang the tin few time to release air bubbles.
7 sprinkle Choco chips
8 bake at 180'c for 30 mins

Almond Crisps

I've made this Almond Crisp yesterday and as soon as it cool down, half of the fresh bakes were in RY and bb's tummy!

Yes, this is very yummy and easy to make too!

Ingredient
Plain flour 50g (sieve)
Butter melted 30g
Almond slice 100g
Vanilla extract 1/4 tsp
Egg whites 2 (each eggs weigh 64g with shell)
Castor sugar 60g

Method (preheat oven 180'c and line parchment paper on baking tray)
1 hand whisk egg whites till bubbles form
2 beat in sugar in circular motion till sugar dissolve 
3 add in vanilla extracts and mix well
4 add in flour till no traces of flour
5 fold in almond slices
6 add melted butter till well combine 
7 spread thin layer of the batter on the parchment paper and ensure no overlapping of the almond slices (I spread it over the big rectangular baking tray surface and cut into small pieces when it cool down)
8 bake in the oven at 180'c for about 20 min or turn golden brown


Last day in school

Last Friday was bb's last day in school as she'll go to a new one in February after our CNY trip from Ipoh.
Yes, we're changing bb to another sch because I don't really like the food menu there.
Weekly lunch menu includes hotdog, fishball, fish cake, chicken nuggets and crab stick and these are processed food which I seldom (actually never) give her at home.
However, the school still keep a place for her so that we can go back should she can't adapt to the new one.

To let bb bid goodbye to her friends and teachers, I've baked some Choco and blueberry muffins for her to distribute to them individually.

I've used the recipe in my blog but up the qty to 18 for each flavor to yield total 36 muffins.

On Thursday night, after putting bb to bed, I packed the muffins in a ziplock bag with a Thank You & Goodbye message stick on.

Friday, January 3, 2014

Homemade play dough

Yesterday I made these play dough for my baby.

Recipe
My simple recipe to yield the above 5 dough
2 cups plain flour
1 cup salt
2 cups water
1 tbsp cream of tartar
2 tbsp oil

Methods
Mix all the ingredient and boil (keep stirring) over low heat till all lump up together and the dough not sticky.
Wait till cool down then knead
Knead n add desired coloring (I used food colour)

After each play, place in zip lock bag and store in fridge to last for a couple of months.
If it dries up, just add some water and knead.
Discard if it turns moldy.


Tuesday, December 31, 2013

Very Sick!

I've been sick since Christmas Eve, in fact I was not feeling well since BB Rae's birthday since I'd stayed up through the night to complete her birthday.

On Christmas Eve morning, I rushed to Phoon Huat to get the baking stuff for the Christmas Oreo cheesecake and caught a cold there due to the blasting aircon.

My body temperature spike to 38.8'c on Friday and developed terrible sored throat.
I refused to go to doctor since I know I'd never take the antibiotic, so I endured the terrible body ache and sore throat till now.

My throat is still inflamed but is better then what it was 2 days ago and still have fever around 38'c.
I hope to get well by tomorrow to receive the new year!

It is my worst nightmare to fall ill with no help and still have to look after bb, do housework, cooks and clean etc.......
I get very depressed whenever I am ill........

Fear of a SAHM (with no help) is to fall sick!


Wednesday, December 25, 2013

Merry Christmas 2013

Bb Rae loves cake, just like mommy.
To make her a happy girl this Christmas, I've made her a Oreo cheesecake.


Sunday, December 22, 2013

Home Bake Birthday Cake

This is my 1st attempt in making a cake with frosting and decor.
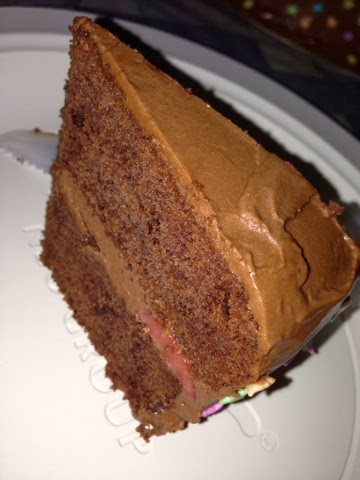
It is a chocolate cake with chocolate icing and fresh strawberry filling.


Saturday, December 21, 2013

My Precious Bb Turns 2 Today!

Today, 21 December 2013, marks another milestone for my bb and me.
Yes, she turns 2 years old today and am a mum for 2 years and still counting on .........

I've set the timeline to give her strict home cooked food till she turns 2 and from now onwards, I'll be slightly lax in introducing outside hawker/ restaurant food.
So it means, I'd not need to cook porridge early in the morning for her lwhen we are going out for  lunch or dinner.

She has almost all her teeth in place except for the last 4 molars, so she now has powerful jaw to chew on almost anything.

To celebrate her 2nd birthday, I've baked a chocolate strawberry cake her.
This cake took me almost whole of last night to complete as it's my first time baking a 2 layered cake with frosting and decor.
I've baked the cake yesterday afternoon while bb was having her afternoon nap and only make the icing, frosting and decor at 11pm after putting her to bed.

I gotta complete the tedious baking and frosting by this morning as we need be in school for bb's annual Parent Teacher Conference and follow by lunch for our small family celebration at a Japanese restaurant.

I've done 90% of the cake decor and left with the last bit of decor to be assembled at my mum's place later.
Yah, we are celebrating her birthday at my mum's place tonight.

I can only take the cake pic when I put up everything together at my mum's place.

My darling girl, Happy Birthday!
Mommy loves you always!


Wednesday, December 18, 2013

Banana Blueberry Muffins

We've some over ripen banana and some blueberries so I've decided to use them for baking.

Banana blueberry muffins recipe
Ingredients: 
Dry
250 g all purpose flour 
1 tsp baking powder 
1 tsp baking soda
 1/2 tsp ground cinnamon 
1/2 tsp ground nutmeg
1/4 tsp salt

Wet
60 g unsalted butter (melted, at room temperature n mix into the wet ingredient but I prefer using cold butter doing rubbing in method to the flour
 60 g fresh milk 
2 eggs (lightly beaten) – I used medium 60g eggs 
2 tsp vanilla essence 
80 g  sugar 
 3 big over-ripe bananas (mashed) – about 80g each
I mashed 2 and lightly mashed 1 to be used as fillings insert in the middle of the mixture of the muffin cup
80g blueberry (leave some to sprinkle on top)

Method
1 Mix dry ingredient - flour, baking soda, baking powder, cinnamon, nutmeg powder and salt in a bowl
Add in cold butter using rubbing in method.
2 marshes 2 banana till liquid like and likely mash the last one and leave aside.
3 Mix wet ingredient - egg, vanilla essence, milk and sugar then add in the marshy banana
4 preheat oven to 200'c and grease the muffin tray 
5 pour dry ingredient slowly to wet ingredient scope by scope and mix, then add in blueberry
Note: lightly mix and limit the mixing stroke to achieve fluffy muffin texture
The batter must be "spoonable" and not too wet.
6 Scope into the muffin cups till 90% full and sprinkle some blueberry on top
7 Bake in 200'c oven for 5 mins then turn to 180'c for about 15 mins or golden brown

Yield 12 muffins


Thursday, December 12, 2013

My love still gives me flower

Yes, RY gave me 2 dozens of pink roses for my birthday!
I'm very happy that he still gives me flower.

Wednesday, December 11, 2013

Happy Birthday 2013

Today is my 2nd birthday I celebrated with my bb Rae!
RY took a day off and we went to view a new school in the morning after sending bb to school (we are contemplating to switch her to another school as I'm not happy with the food menu in her current school which consist of hotdog, crab stick and fishball etc).

We fetched bb from school at about 12 noon after her lunch in school and went to Itacho for sushi/ sashimi lunch.
Bb only had steam egg since raw fish is a big No No for her.

After lunch, we proceeded to Swensen for ice cream.

We rushed home by 3pm for bb to take her afternoon nap.
While she napped, I started to prepare dinner.
Yep, just like Cinderella, I transformed from a happy n glam mommy (dolled up in dress) to a typical auntie doing the washing, cutting, cooking and cleaning etc........

This is my cheeky girl who will turn 2 years old in a weeks time!

Tuesday, December 3, 2013

Pandan Chiffon Cake

I've always wanted to bake chiffon cake but was told how tricky and difficult it can be as any mistake made during the preparation or baking processs, the whole cake will be a disaster.

With my new KA mixer, I feel that it's time for me to venture into "Chiffon" baking.

I'm not too receptive in using artificial flavoring so I bought a bunch of fresh pandan leaves to extract the juice with the help of my muscle man - my hubby, RY, since I've don't have the juicer equipment so I need him to do manual squeezing using the bare hand.

Pandan Chiffon Recipe

Pandan Juice Extraction
A bunch of pandan leaves (about 20 to 30 leaves)
Trim away the tip and discard old and dried leaves
Wash and soak leaves till water is clear
Blend with minimum water
Squeeze the juice out
Leave in fridge for over night to get the dark green substance settles.
Use 25g of Pandan juice extracts

Coconut milk 70g (preferably fresh but pasteurized packet from the cold refrigerator section in supermarket is ok)

Mix coconut milk and pandan juice to get 95g total volume of mixture and set aside at room temp

Egg White
180 g egg whites (I used 5 egg whites as my eggs are smaller)
½ tsp cream of tartar
50 g sugar

Egg Yolk
60 g egg yolks (I used4 yolks)
50 g sugar
60 g vegetable oil
¼ tsp salt
100 g cake flour, sifted with baking powder 
1 tsp baking powder

Method (preheat oven 180'c and ensure the lowest rack in the oven is used for the baking, wash and dry a 21cm chiffon tin - ungreased and clean dry tin)

Egg Yolk
1 Mix yolk and sugar in mixer and whip till pale yellow, thick & creamy and ribbon like
2 Add in green coconut mixture mix till evenly incorporated 
3 Add in oil and mix till evenly incorporated
Set aside mixture

Egg White
1 beat egg white till foam like using mixer
2 add in cream of tar tar
3 add in sugar in 3 portion to beat till stiff peak

Cake mixture 
1 add in cake flour sifted with baking powder into the egg yolk mixture and mix till well incorporated with no traces of flour
2 fold in egg white into the egg yolk mixture in 3 batches
3 lift up bowl and hit few times to release air bubbles
4 gradually pour the mixture into the chiffon in
5 use a chopstick to run around the edge of the tin to release more air bubbles
6 even out the surface

Baking
1 place chiffon tin I the oven bake for 15 mins
2 use a baking tray cover the top part of the oven to prevent upper heat to brown the cake surface fast and bake for 22 mins
3 remove the cover and continue to bake for another 10 mins
4 remove from oven and invert the whole chiffon ton upside down to cool the whole tin (cake inside the tin) for min 1 hour
5 when cake is completely cook, run a sharp knife around the tin edge to remove the cake


Sunday, December 1, 2013

Fresh Apricot Muffins

Last week we bought a box of fresh apricot for my baking use.
I like the unique scent of the fruits and if fully ripen, the fruit will be really sweet.
I've left the fruit in the room temperature for 4 days hoping that it will be ripen.
This afternoon I used it to bake a tray of apricot muffins.
But I was disappointed that the fruit was really sour eventhough it had turned soft.
I've to use more sugar in this recipe which I'd normally not.
I'm glad that the muffins turn out really good, not too sweet or sour.

Recipe

Muffins

Ingredient A
Plain flour 250g
Baking powder 1tsp
Baking soda 1tsp
Salt 1/4 tsp
Cinnamon powder 1/4 tsp
Nutmeg powder 1/4 tsp
Cold butter 80g (can be melted n add to Ingredient B)

Ingredient B
Egg 2 (60g each)
Milk 60ml
Sugar 120g (if the fruit is sweet, use 90g)
Vanilla essence 1tsp
Fresh apricot 250g and remove skin and stone to purée which yield 160g (coarsly blend to have some bits n pieces)

Method (preheat oven 210'c and line 12 muffin cups in tray7
1 mix ingredient A and B separately in different bowl
2 add in cold butter in A using rubbing in method
3 mix B into A gradually with minimum stroke, fold till no traces of flour till mixture is lumpy and spoonable but not dry
4 scope into muffin cups till 90% 
5 bake 1st 5min at 210'c and next 15 min at 190'c

Yield 12 muffins


Banana Orange Muffins

I'm exploring diff flavor of muffins and this time I mic orange with banana and the taste is fantastic!

I've used the banana muffins recipe done previously and substitute 30ml juice and reduce milk to 30ml.
I also use 2 orange zest.


Friday, November 29, 2013

Kitchen Aid

This is my new Kitchen Aid mixer which I hand carried back from Mayer warehouse sales.
The sales told me the weight is about 5kg, so I thought I should be able to manage taking it via bus service.
After much toil and sweat, I mananged to bring it back via bus service as I'm very thrifty and didn't  want take taxi.
The equipment was really heavy and I didn't think it weighed just 5kg.
When I got home, I checked the specification and realised that the actual weight with box packaging was about 12kg!
No wonder I was so drained out and exhausted when I got home!


Banana walnut cake


I just got a Kitchen Aid mixer KSM150 yesterday and today I used it to whip up this simple banana walnut cake.


RECIPE FOR BANANA WALNUT CAKE

Baking tin: 1 unit of 8" x 3.5" x 3" (height)

Ingredients:
60g unsalted butter
80g castor sugar
1 egg (medium) – at room temperature, lightly beaten
130g plain flour (can use cake flour)
½ tsp baking soda
¼ tsp baking powder
¼ tsp salt
80g plain yogurt 
2 or 3 fully ripen bananas (120g)
30g walnuts

Preparation:

  1. Cut butter into 7-8mm thickness and leave it at room temperature until it turns soft (it is ready to be used if you can press it lightly with your finger tips). Or grate the frozen butter into the mixer bowl and let it soften while preparing other ingredient.
  2. Combine flour, baking soda and baking powder in a mixing bowl and sieve twice.
  3. Put walnuts on a baking tray and roast them in a preheat oven at 120°c for 15 minutes. Remove from oven and let it cool down completely before breaking up into smaller pieces.
  4. Lightly grease the baking tin and line with grease-proof paper.
  5. Preheat oven to 180°C (at least 15 minutes)

Methods:

  1. Cream butter, sugar with an electric mixer and beat till mixture is well combine and look creamy.
  2. Add in vanilla essence. Make sure it is well combined in mixer.
  3. Add in lightly beaten egg little by little, beat until creamy using mixer.
  4. Add in salt and mix well in mixer, then remove from mixer to check texture is creamy before commencing step 5 onwards.
  5. Mash bananas with a fork. Add into the mixture and mix well using a spatula.
  6. Add in 1/3 flour mixture through a sieve and mix well by folding in gradually.
  7. Add in yogurt and mix well.
  8. Add in the remaining flour mixture through a sieve. Use a spatula to fold into the mixture until no traces of flour. Do not over-stir the batter!
  9. Add in chopped walnut and mix well. But leave some to sprinkle.
  10. Pour the mixture into the greased lined baking tin. Shake it lightly to distribute the cake mixture evenly.
  11. Bake in a pre-heat oven at 180°C for 50 minutes or until golden brown and fully cooked. If a toothpick comes out clean, it is done.
  12. Remove it from the oven and leave the cake in the tin to cool on the wire rack for another 5 minutes. Best to serve it warm.

Note:

  1. If the cake turns brown before end of the cooking time, cover it loosely with a piece of aluminum foil.


Thursday, November 21, 2013

Banana Walnut Muffins

This morning I baked this banana walnut muffins.
The recipe is same as the previous banana muffins except that I added 100g of walnuts which I've pre-roasted at 180'c for 12mins.